Debugging is the process named to analyse program flow while the program is running. There are multiple ways to find out an issue with the code and this post describes the easiest one which needs you to have code free from any compiling or linking errors. This Debugging is for finding logical errors in your C++ Projects and is not for fixing compilation errors. In case you are new to Microsoft Visual Studio, the C++ Hello World Project can be a really great place to start with. In case you are well aware of how to compile and write a basic C++ program using Microsoft Visual Stdio, let’s take an example and find out how to debug the program to find out logical errors.

Debugging of a C++ Project in Action
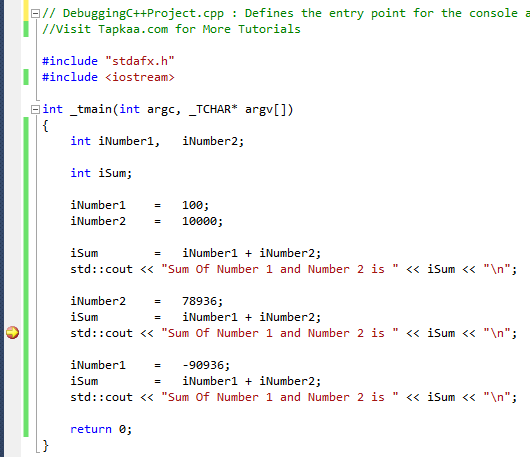
The above sample C++ Project has been compiled and is currently being debugged to find out logical errors. In order to start debugging of your C++ project, write some code, build it using the F7 shortcut key and press the F5 button to start debugging. Yes it is really simple and lots of windows will popup automatically as you start debugging. Note the red colored dot at the left hand side of the screenshot, which is basically a breakpoint set using the keyboard shortcut F9. A BreakPoint in debugging is used to denote a statement in the source code, at which the debugger must stop and allow you to view the values of local or member variables, display which functions were called in which order (also known as call stack) as displayed in the debug windows below.

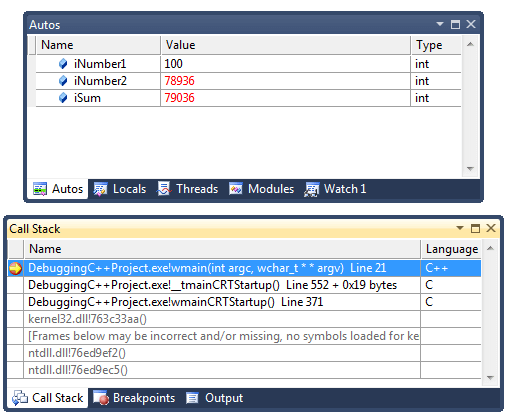
Watch Values of Variables and Function Calls while Debugging
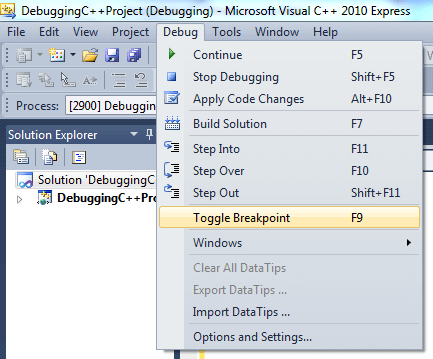
Note the values of local variables are displayed in the Autos Debug Window. In order to execute your program step by step, press the keyboard shortcut F10 and the debugger of Microsoft Visual Studio will execute one statement at a time and simultaneously will display the values of member variables and function names as they are called. In case you do not want to use keyboard shortcuts, you can start with the Debug Menu of Microsoft Visual Studio to learn Debugging of C++ or even C Projects.

Debugging C++ Project in Microsoft Visual Studio Express
You can even do changes to your code while the code is being debugged and Apply Code Changes. Most of the Software Developers prefer to use the Keyboard Shortcuts to debug and find out logical errors or find out what’s happening inside their own created application file.
In Summary follow given below procedure to debug your C++ or C Projects. The Debugger of Microsoft Visual Studio Express Edition is a well written and useful software application.
- Write the Code in Microsoft Visual Studio Express Edition and Build it (Keyboard Shortcut F7).
- Locate a Statement in your C++ Project where you want to know the values of variables, call stack and basically start debugging. This Statement can be at the start of the program, in middle or anywhere else. Press F9 to set a Break Point at the statement where you want the debugger to pause and show you values of member variables, display call stack etc. The Break Point in Visual Studio is indicated with a Red Dot at the left hand corner of the code window as displayed in the first screenshot above.
- Press Keyboard Shortcut F5 to start debugging. Lots of Small Windows will popup displaying you what’s happening inside the application by displaying call stack, member variables, local variables etc.
- Press F10 to execute the current statement and move on to the next statement. Press F5 when you want to proceed to the next breakpoint or simply continue program execution.